Building Memories (BM) uses personal experiences to explore topics of importance to building.
This BM highlights a boutique project: creating a small home recording studio.
My family moved into our current residence in 1992. The original portion of the house was built around 1868, but over the years, various owners had added hodgepodge additions that were poorly designed and constructed. In fact, the house was a safety hazard. Still, it fit our budget, so we moved in, saved our money, and in 1994–1995, we removed the additions, kept the original frame, and roughly tripled the livable space, including a basement area that served two primary functions over the years:
- The Do-Everything Room – When our kids were growing up, this semi-finished space became a hands-on, mess-friendly area where they could explore, experiment, and create without worrying about spills or accidents.
- Future Recording Studio – The same room was designed with a second function in mind, though it wouldn’t be realized for many years.
Once the kids were older and mostly out of the house, I revisited the space. Around 2010, I researched and planned the studio layout, installed acoustic isolation insulation, and added knotty pine paneling.
Life, however, kept getting in the way, and it wasn’t until 2017 that I purchased the core recording equipment and finalized the installation.
Working with cables, soldering ¼”, MIDI, RCA, and XLR connections, brought back memories of my first soldering project. My cousin and I had assembled a Heath kit radio when we were about 10 years old, and it actually worked.
The studio is comprised of several integrated devices. Honestly, I could have started with far less and still recorded at the level I do today, but figuring out the system, building it, and assembling the parts was deeply satisfying. Here’s a list of the main components:
- Three patch panels with a mix of MIDI and ¼” connections:
- 16-port patch panel
- 6-port patch panel
- 8-port patch panel
- Four built-in speakers (great for playback and jamming)
- Flat-screen TV
- Computer with Studio One recording software (I know, most people use Pro Tools!)
- Behringer X-Air 16 Channel Mixer
- Behringer Xenyx Control2USB studio monitor control
- Behringer 4-channel microphone pre-amp
By the winter of 2017, the studio was ready for its first test recordings. The first week was exhilarating, recording and layering multiple tracks and hearing them together for the first time was amazing! Over time, I learned that achieving clean, well-synced tracks is real work, especially at my amateur skill level.
Over the past eight years, the studio has gone through at least two significant working phases. Each time, I would spend a few hours, two to three times per week, focusing on recording and improving my technical skills. One key lesson I learned: the more I focused on mastering recording technology, the less I enjoyed playing music. It certainly tempered my initial enthusiasm, but I hope to return to writing and recording music this winter.
One product of these initial recording sessions is a song called “Spirit Eyes.” I invited a drummer and a bass player to join me, and this is the result of our one-hour session.
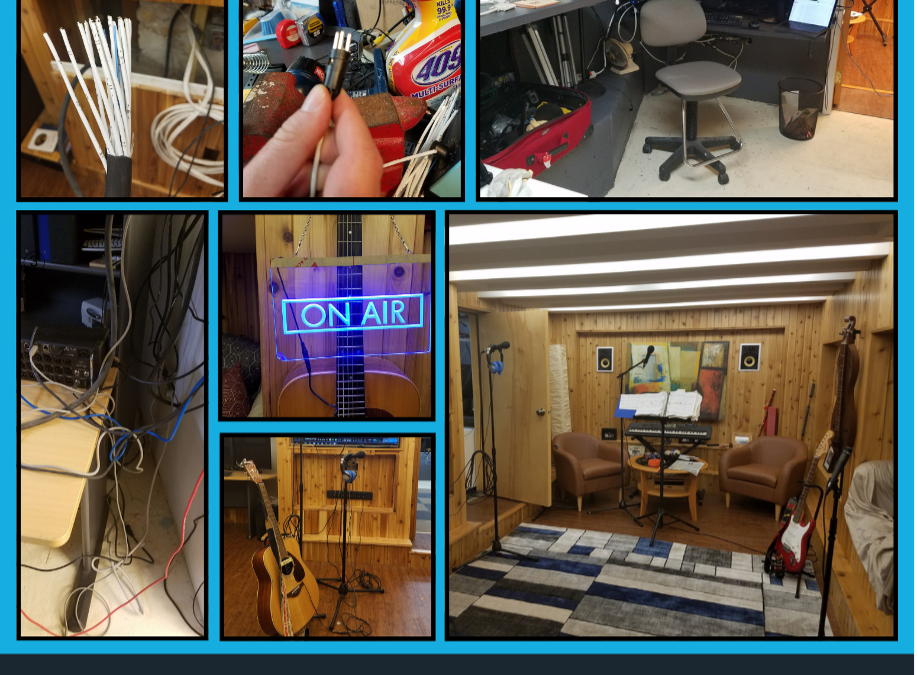
Photo 1 – Organizing Wires
Photo 2 – Soldering Connectors
Photo 3 – Setting up cables
Photo 4 – Control Room
Photo 5 – Ready To Record
Photo 6 – On Air
Photo 7 – Looking Finished